Storage Chest Craft

Step-by-step DIY crafting tutorial for a doll clothing storage chest! 
 
Flora Fox was choosing an outfit this morning when she paused and considered her clothing storage. She had been keeping her sweaters and pants neatly folded in a paper berry basket that she found on River Road. The berry basket was perfectly nice and it worked fine, but Flora thought to herself, "I believe this system is lacking flair." 
 
Like all the woodland friends of Hazel Village, Flora Fox is quite industrious. For example, she loves whittling, and often carves props for the animals' plays in their theater. Naturally, she decided the thing to do in this case was make herself a lovely storage chest. She told us how she did it, so you can make one too.  


What you will need:

  • Some flexible cardboard; we recommend a cereal box!
  • Craft glue
  • Tape
  • A button
  • Needle and thread
  • A pencil
  • A ruler
  • A small piece of felt (not pictured)
  • Paper clips/binder clips (optional but helpful)
  • Stuff to decorate (such as pretty paper, fabric, paint, etc.)


    Part 1: Assembling the Box

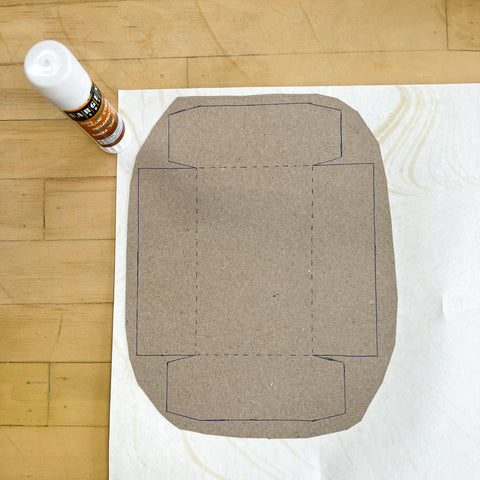
    First, print out this handy downloadable template. Cut it out on the solid lines and trace it onto your cardboard. (Tip: stick the template to your cardboard with a little roll of tape to keep it in place while you trace.)

    Remove the template and use your ruler to transfer the dotted lines onto your cardboard. (We forgot to draw the X but we added it later – it marks where you will sew a button.) 

    We happened to have some fancy paper here at the workshop, so we glued our cardboard to the back side. You could find similar paper at your local craft store or stationary store; wrapping paper would work too, or probably even fabric. If you would rather skip this step, you can paint your trunk instead – there are no rules!

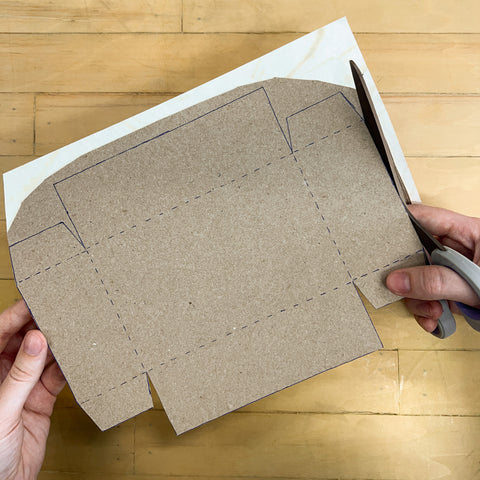
    Cut out your box along the solid lines. Here's the back side of ours with the fancy paper! 

    Fold the cardboard inwards along the dotted lines. 

    You might notice that your corners are a little uneven. That's ok, ours were too. Mark the spot, then trim it down so your corners are snug. 

    (We recommend using a pencil for this craft, but our resident crafting elf could only find a pen.) 

    Apply glue to the tabs in one corner at a time. Hold the corner snug and press firmly for a moment to let the glue set, then secure it with a binder clip or paper clip while it dries. 

      
    Part 2: Assembling the Lid 
    Follow the same steps from part 1 to cut out your lid piece.


    The big rectangle will be curving to make a domed top. To achieve this, press against your work surface to curve the cardboard bit by bit.  


    Apply glue to the tabs on each side and carefully attach them to make a smooth curve. Just like with the box base, use clips to hold it in place. You can also use some tape to help it hold the curve shape while it dries.


    We added some tape to cover up the tabs after they dried, and also painted the inside gold for splendor. 


    Part 3: Making a Hinge
    First, we lined the two pieces up and used three small pieces of tape to attach them. 


    Next, we cut two strips of paper to fit the inside of the box (about 6".)


    Glue one strip along the inside, folded over the edge.


    Close your box and glue the other strip of paper over the seam on the back. 
     
     
    Then reopen the box and use your binder clips on the inside edge to hold the hinge snug while it dries. 
     
     
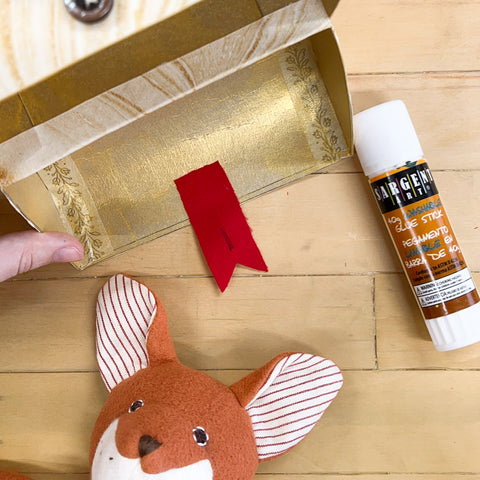
    Part 4: Making the Latch
    Thread your needle – we used an embroidery needle and embroidery floss – and tie a knot at the end. Poke through the X marked on your template, and sew on your button. 
     
     
    Next, cut a small piece of felt. Ours was about 1"x2.5". Fold it in half lengthwise and trim off the inside corner to make a decorative V shape at the bottom. 
     
     
    Next, fold it the other way and snip a slit a little bit above the point of the V to make a buttonhole. 
     
     
    With the button in the buttonhole, fold the felt over the inside edge of the box and mark a line on the felt where the edge of the box is. This line marks where you will attach it to the inside of the lid.
     
     
    Take the felt off the button and apply glue above the mark you made, then attach it to the inside of the lid.
     
     
    Now you are done! 🎉
     
     
    When Flora finished building her storage chest, she did a celebratory leap and said "YIPPEE!" She settled her clothes into their fancy new home and admired how pretty they looked. 
     
     
    Flora planned to invite her friend Lucy Owl over in the afternoon to see her new trunk. Maybe Lucy would like to build one too! 


    In case you are curious what became of the berry basket, Flora gave it to Max Raccoon. He is planning to use it for storing cool rocks.
     

    Did you make this craft at home? Send us a photo or tag us on social media @hazelvillage! For any questions, please email us at hello@hazelvillage.com. 

    You might also like:

    Flower Crown DIY Craft

    Party Hat Printable Craft