🌳♥️
The origin of Hazel Village is a mystery! It exists in a secret corner of the forest, tucked away from the human world we know. Similarly, the animals don’t really have origin stories – as far as we know, they have always been themselves and always lived peacefully in their forest home.
As for the buildings, you can think of it this way: if children have playhouses and such, they don’t dwell on where they may have come from. In Hazel Village, some buildings have been around forever while others are more recent. There was a time when Lucas Rabbit slept in a trundle bed alongside his big sister Zoe, but at some point the animals built him his own little house. When Arthur Lamb moved into Hazel Village for good, Lucas and his friends built Arthur a cottage right next door.
Jane completed a new full-color illustration of the Hazel Village map in 2023. You can see the full map here.
Jane’s map shows all of Hazel Village proper, but the exact boundaries of the animals’ home extends a little bit past the edges. You could walk northward, into the foothills of some mountains, or westward, further into the forest, and still be in their bubble. Thimbleberry Island is hidden off the map, in the middle of the lake which forms the southern border of the Village. To the northeast, you can see part of River Road – this is a human road which runs alongside a grassy bank at the edge of the woods, marking the Village’s eastern border.
For a detailed tour of the Hazel Village map and descriptions of all the key landmarks, see our blog post here.
The woodlands that are found in Amwell Valley, New Jersey (nearby where Jane grew up).
The animals know nothing about our human world, but they sometimes hear things from other animals about faraway places. When Tillie Goose visited, she told them about things she had seen while flying south for the winter – like sunlight sparkling over ocean waves, and a huge field of mysterious wildflowers.
The residents of Hazel Village are not particularly interested in traveling elsewhere. The animals’ cozy homes are a great joy to them, and the fields and forests surrounding the Village hold all the adventures they could dream of. They are quite content!
The only place that some Villagers regularly visit outside the borders of their home is a nearby farm. Flora Fox and Nicholas Bear Cub, and sometimes Max Raccoon, will take Nicholas’s wagon to the farm to acquire eggs, milk, and wool by way of bartering shiny trinkets and choice nuts from the forest. They deal directly with the farm animals – much the best way to go about these things – and return home with their haul tucked into the wagon (which is full of bracken and moss for cushioning). Then they make butter and tasty cheese to share with all their friends.
Emma and Penelope Rabbit are twin sisters. Zoe and Lucas Rabbit are siblings – Zoe is older. Reginald and Owen Fox are cousins. Aside from these pairs, none of the other animals who live in Hazel Village are related. Whether or not they may have relations elsewhere in the world is a mystery!
Emma Rabbit loves making up dances for May Day. Penelope Rabbit loves working on indoor crafts, like stringing beads.
An interesting question! We presume they speak English, but we’re not really sure; maybe they are communicating to one another in sophisticated snuffles.
Not as far as we know – however, they certainly would not turn down any opportunity to have a celebratory party.
You can download these printable doll-size party hats and birthday banner in our craft blog here.
The Villagers operate on a gift economy – that is, lots of giving each other nice presents and trusting in the abundance of sharing. Sometimes they also barter for things, like when Flora and Nicholas visit the farm.
Not much! Think farmhouse, pre-electric. The animals’ homes are lit by sunlight through their windows in the daytime, and by lantern light at night. Nicholas considers his little red wagon to be pretty high-tech, though, and Lewis Toad says the same thing about his wood-fired kiln.
Hazel Village is unique in its region. If there is anything like it elsewhere in the world, that’s a mystery to us. Some animals who visit the Village simply happen upon it and decide to stay for a while. Other animals hear about it in their travels, and decide to make the trip to meet the woodland friends. Animals who visit are mostly nomads; they each very much enjoy their stay, but ultimately want to keep on traveling and having adventures elsewhere.
Marnie Chicken is currently visiting Hazel Village. You can meet previous limited-edition visitors in our Guest Book.
Jane imagines that the human friends live somewhere close by to Hazel Village, in a similar landscape – maybe across the lake– and that they are all part of a public library reading group together. Their proximity to Hazel Village means that some magical energy makes its way to them and influences their adventures, projects, and love of nature. Officially, the world of the animals is a secret from the human world. However, the kid dollies have wonderful imaginations that allow them to travel wherever they want to go, so anything is possible!
Meet the dollies here!
That's all for now, friends! Thank you for reading.
Questions? Feel free to email us at hello@hazelvillage.com!
You might also like:
]]>Whenever Marnie is skipping along a meadow path and a glint of something shiny catches her eye, she will pause and give the object a thorough pecking to ascertain its quality. If it passes muster, she will tuck it safely into her basket backpack. Marnie had a few such trinkets with her when she arrived at the Village, though not quite enough to make the wind chime she envisioned. But this was no problem at all for a resourceful chicken – she said, “I reckon I know where I could find some more!” and marched right down to Max Raccoon’s house.
The residents of Hazel Village often introduce themselves with their favorite hobbies, so Marnie already knew that Max is a great collector of trinkets. When she explained her vision, he was more than delighted to help her out. (It just so happens that Max loves making wind chimes.) He showed Marnie his lovingly organized collection of trinkets, and together they selected several shiny things for her project. Then it was time to get to work!
Marnie chose 8 shiny objects in a mixture of silver and gold: four buttons, a bell, a hex nut, and two bracket-y things. She once heard from someone that you shouldn’t mix metals, but to that she says, “Pshaw!”
Now, the beauty of a wind chime is that you can make one out of just about anything. If you wish to follow Marnie’s lead and seek out small shiny objects, the first step is to go foraging in your house or around your neighborhood. When foraging in your home, make sure that any items you find do not serve an important purpose and are therefore ok to turn into art. When picking up appealing junk from the street, we recommend giving the items a wash and also being careful in case of sharp edges.
Marnie decided her wind chime called for making some cordage, so the strings would be sturdy and more interesting to look at. She crocheted her string by holding part of it in her beak and the rest with her wingtips – impressive dexterity, Marnie! We are assuming that you have human hands, so we will teach you a different method.
We used a finger-crochet technique, which is a fast and pretty way to make cordage with no special tools. It is essentially the same technique used to hook-crochet a chain stitch: you may find this video tutorial of that technique helpful to understand the theory. If you want to skip this step, you can also braid your string or just use it as-is.
To begin, cut a long piece of string and make a slipknot at one end. This creates your first loop. The shorter end of the string is your tail, and the longer end is your working string.
Hold both the tail and the working string securely in one hand. With your other hand, reach through the loop and grab the working string. Pull the working string partway through the loop. Then pull the tail until your original loop tightens into a knot, and the working string has formed a new loop. Now you are set up to crochet!
Pull the working string partway through the loop again, then pull on it to tighten and make a new loop. Repeat this step until you have the desired length of cordage. To finish your cord, pull the working string all the way through the loop and then pull it tight.
Since Marnie had 8 objects, she made 8 cords: each about 4” long, with extra un-crocheted string on either end. When you are making your cords, make sure to think about the height that you would like your objects to hang at.
Tie one end of each cord to an object and knot it securely, trimming off the extra string.
Tie the other end of each cord to a stick. Knot securely and trim off extra string.
Marnie tied 4 objects to each stick, spaced evenly apart with a wider gap in the middle.
Place your sticks in an X shape, one on top of the other.
With one end of a long piece of string, tie a knot around the sticks to hold them in place.
Wrap the rest of the string tightly around the sticks in an X shape to bind them together. Tie off on the bottom side and trim extra string.
To hang your wind chime, make 2 additional cords that are each a little bit longer than your sticks. Tie these cords to the ends of your sticks, overlapping in the middle.
Make one more short cord and tie it in a loop.
Knot this loop around the center point of the crossed cords, so that your wind chime is balanced when you hold it up.
Marnie Chicken is a limited-edition animal! Shop our visiting friend now before she departs the Village for her next adventure.
Did you make this craft at home? Send us a photo or tag us on social media @hazelvillage! For any questions, please email us at hello@hazelvillage.com.
You might also like:
And just in case you might be considering an animal for yourself or a friend this Valentine's Day, we made a handy flowchart to help you choose! 💌
You might also like:
The Animals' Holidays and Festivities
If you have any questions or just want to say hi, you can always reach us by email at hello@hazelvillage.com.
The woodland friends of Hazel Village celebrate many holidays each year. Some may be familiar to you, while others are of the animals’ own invention. We hope you will enjoy reading all about them in this blog post!
Snug in their forest homes, the animals reflect on the friends they made and the adventures they had in the year gone by. They tidy up their cottages and vigorously shake rattles full of beans to celebrate the potential of the new year.
Lewis Toad tidies the Lodge for the New Year
~
The animals make valentines for one another, which Oliver Mouse delivers in his capacity as mail carrier. You can read about Oliver on Valentine’s Day in our two-part blog post from 2016: Valentines Part 1 and Valentines Part 2.
Gwendolyn Raccoon and Nicholas Bear Cub exchange valentines
~
When spring begins to spring, the animals play their noisiest instruments to wake up their hibernating friends. They sing, just as loud as can be: “WAKE UP! WAKE UP! TIME TO WAKE UP!” You can learn more about the Wake-Up Day Band in our craft tutorials for the animals’ instruments: How to Make a Drum and How to Make a Bell.
The animals playing in their Wake-Up Day band
~
During the spring & autumnal equinoxes, the Villagers like to dress up like birds and march in the Bird Parade. In the spring they march north while calling out to welcome the birds, who are flying overhead as they return from their winter journeys.
Nicholas Bear Cub wearing a pelican hat (2021)
~
First, each animal gets ready by decorating an egg. Then they draw straws to see who will be the Egg Day Bunny. (This is a ceremonial title and not exclusive to actual bunnies.) The Egg Day Bunny hides the eggs overnight, and whoever finds the most eggs in the morning gets a prize. The Egg Day Bunny always wears a special garment: the Egg Day Honorary Egg Sash. See how Zoe Rabbit made her Egg Day sash in our craft tutorial here.
Zoe Rabbit hiding an egg in her official duty as Egg Day Bunny
~
The animals make beautiful shad banners out of fabric, paper, ribbons, and twinkly stuff. (A shad is a kind of fish, in case you didn't know.) The animals hang the banners out in front of their houses and on trees, and they billow in the spring breezes and inspire the shad to swim up their stream. Gracie Cat especially looks forward to the Shad Festival, because for her it means a tasty fish fry.
~
To celebrate that summer is on its way, the animals make wildflower garlands and dance around a Maypole. There is much festooning of ribbons. May Day is Emma Rabbit’s favorite holiday – she collects ribbons all year long, and teaches special May Day dances to the other animals.
Emma Rabbit leading the animals in a Maypole dance
~
On the shortest night of the year, the animals gather to watch the fireflies twinkling among the meadow grasses and treetops. They have a forest party with twinkly lanterns, music, and dances. Phoebe Fawn has composed a book of songs for the occasion.
Phoebe Fawn admires the industrious twinkles of her firefly friends
~
There are many throughout the summer and fall. When the type of fruit is ripe or the type of nut is ready to harvest, the animals spend a day going out to pick it, then another day making it into jam, pies, etc. Extra appreciation if you dress alike to that thing.
Here are some fruits and nuts that the animals celebrate, and the month in which these festivities usually occur:
At the Strawberry Festival each year, the Grand Strawberry Crown is worn by the animal who finds the biggest berry of the season.
~
In the autumn, the animals dress up like birds and march south in the Bird Parade. They scatter birdseed and perform their best birdcalls. That way, the birds who are flying overhead can have a little snack, and a helpful guide of which way to fly.
Oliver Mouse dressed up like a bluebird (2021)
~
The Villagers harvest all the late season vegetables and make a huge pile. Some vegetables will be preserved for the winter; others will be cooked up right away and eaten together to celebrate the year’s harvest. Everyone says what they are thankful for, and then hibernating friends go to bed.
Lucas Rabbit wearing a Squash Festival commemorative sweater (2019)
~
On the longest night of the year, when pond is cold enough to skate on, the animals have a twinkly lantern ball. Then they stay up all night long in the Lodge, drinking cocoa and singing songs. They take turns sneaking outside to the Present Tree, to decorate it with beautiful decorations, birdseed treats, and presents for their friends. In the morning when the sun comes up, they open their presents together.
Annicke Mouse decorates the Present Tree
~
Those are all of the animals' holidays, so far as we know! Thank you for reading, friend. If you would like to learn more about life in Hazel Village, we highly recommend our storybook, The Gifts of the Year. Written and illustrated by our head elf Jane, the book follows Gwendolyn Raccoon and her woodland animal friends as they enjoy every season in Hazel Village. They celebrate holidays; harvest the treasures of field and forest; and make nice presents for their friends.
You might also like:
If you have any questions or just want to say hi, you can always reach us by email at hello@hazelvillage.com.
]]>
A galette might sound fancy, but it is basically just a pie made without a pie dish. This easy recipe makes six small galettes, which are perfect for several woodland friends to share.
The first step in this recipe is to prepare your pastry dough. Gracie always makes her pie crust from scratch, but you could also buy some at the store if you’d prefer.
The most important trick for achieving flaky pie crust is to keep your butter cold. Cut 12 tablespoons of cold butter (1 1/2 sticks) into small pieces. If the butter starts to get melty while you are slicing it, put it back into the fridge for a few minutes while you mix your flour, sugar, and salt in a large bowl.
Add the cold butter to your bowl of flour and toss them together. Using a fork or your hands, break up the butter until the largest pieces are about the size of a pea. Refer to Gracie’s mixing bowl in the photo below for how your mixture should look at this stage.
Next, add ice water one tablespoon at a time and mix after each addition until the dough starts to stick together. The dough should be moist enough to hold its shape, but still a little bit shaggy. Here is a helpful video to show you how it should come together. When your dough is ready, squeeze it into a disc. Then wrap it in plastic or place it in a covered container and set aside in the fridge for half an hour.
Preheat your oven to 400ºF. (Gracie Cat bakes with a wood stove in the Lodge, so she heats her oven by adding kindling to the fire; we are assuming yours is a little less rustic.)
To prepare the filling, first peel, core, and thinly slice your pears.
Toss the pear slices in a bowl with about 2 tablespoons honey and 1-2 teaspoons cinnamon. We found it worked best to toss this mixture with our hands so we wouldn’t accidentally mush the pears, which are quite soft. Let the filling sit until your dough is ready to roll out.
Divide the dough into 6 equal pieces, and roll them out one at a time to about 1/8 inch thickness. Make sure to work on a clean surface, dusted with flour to prevent the dough from sticking.
Place 4-5 pear slices in the middle of each dough piece. Fold the edges of the dough up around the pears, crimping it in place.
Brush each galette with melted butter, then sprinkle sugar over the crust. Arrange the galettes on a parchment-lined or lightly greased baking sheet and bake for 30-35 minutes, rotating the pan halfway through.
If you have extra filling, mash the pears and pour them into a baking dish. Bake in the oven alongside the galettes, and you will have a lovely pear-sauce as an extra treat.
While the galettes were baking, Gracie invited Gwendolyn Raccoon over for tea. They sat cozily by the wood stove and chatted about the goings on in Hazel Village. Gwendolyn told Gracie about Lucas Rabbit and Arthur Lamb's excellent snow fort, which she had seen them building on her walk over. Gracie told Gwendolyn that Phoebe Fawn's Twinkle Day composition will feature jingle bells this year, so Ella Toad is practicing rhythmic stomping in her jingley boots.
When the galettes were golden brown, Gracie took them out of the oven. She put one on a plate and drizzled honey over it, then set it in front of Gwendolyn. Gwendolyn said she had never seen a more beautiful treat, or smelled a more delectable scent. Once it had cooled a little, the friends shared it and agreed it was quite tasty indeed. Good job, Gracie!
This recipe was adapted from Snixy Kitchen's Personal Pear Galettes.
Did you make this recipe at home? Send us a photo or tag us on social media @hazelvillage! Questions? Email us at hello@hazelvillage.com.
You might also like:
]]>Read on to see how Nicholas made his sled, and learn how to make your own.
What you will need:
To get started, print the pattern from this downloadable PDF and cut out each piece. Then trace the paper pattern pieces onto your cardboard.
As you trace each paper piece, mark where the dashed (FOLD) and dotted (SEAT PLACEMENT) lines end, so you can use your ruler to transfer them onto the cardboard.
You should have 1 SLED piece, 2 SEAT pieces, 2 RUNNERS, and 6 RISERS. Cut all the pieces out along the solid outlines.
Next, fold all the pieces on the dashed lines. Here is our trick: place your ruler along the line and press down, then fold the cardboard over it. The ruler will act as a straightedge to keep each fold nice and neat.
Once all your pieces have been folded, it’s time to put the sled together!
To assemble the main sled piece, glue each tab to the inside. Try to make sure the corners line up nicely; you can trim the cardboard if any part is sticking up.
Press firmly on each tab for a minute before moving on to the next one. You can also use a paper clip or a binder clip to hold a tab in place while it dries.
Next, apply glue to the tabs of one seat piece and tuck it inside the sled along the dotted lines. Repeat with the second seat.
The little strips of cardboard that are your RISER pieces will each form a rectangular block with two overlapping ends on one side. To assemble them, glue the overlapping ends together on each.
These should be fairly even, so trim them before glueing if your blocks are looking wonky.
At this stage in the process, we went ahead and painted everything because we thought it would be easier than doing it later. In reality, painting the risers was pretty fiddly and would probably have been easier had the sled been fully assembled. Do as you see best.
Glue the six risers to the bottom of the sled at the front, middle, and back, as shown in this photo.
Apply glue to the bottom of each riser, and attach the runners. The flat ends of each runner should be aligned with the front risers.
For the handle, cut a length of yarn and tape the ends to the inside corners at the front of the sled.
If the sled of your dreams is sleek yet unadorned, you are done! We wanted to decorate ours, so we sketched a leafy design in pencil before painting over it in white.
Nicholas says he is still getting the hang of painting decorative motifs, but he likes to challenge himself when a project calls for it. If you want to try a simple design for your sled, he recommends some stripes.
He also added an acorn on the front for extra pizzazz. Once the paint dried, the sled was done!
Nicholas settled his elephant, cardinal, and skunk dollies comfortably into the sled, and set off down the snowy path, pulling it along behind him. As he passed the other animals' houses, his friends poked their heads out to shout their praises. Nicholas marched proudly past, thanking them politely as he went. This project was a success! ❄️♥️
Our new mini skunk and cardinal will be available on Tuesday, December 12th at 1PM ET with the Festive Gifts Collection. Shop our mini elephant dolly here!
Did you make this craft at home? Send us a photo or tag us on social media @hazelvillage! Questions? Email us at hello@hazelvillage.com.
You might also like:
]]>Here at the Hazel Village workshop, we humbly consider ourselves gifting experts. We learned from the best – the animals, that is. The woodland friends know ALL ABOUT making and giving presents, and our philosophy has always been to do as the animals would do. Their motto is "Industry and good cheer, every day and every year!"
We treat every order we receive here at the Village as if it is a gift. Prices are always excluded from our packages, and we take care to nicely wrap each and every item so they arrive at your home ready for gifting. We work hard to make sure all our gift wrapping is REALLY cute, so we think you'll want to take a look.
First up is our Holiday 2023 collectible printed bandana!
This year's original bandana artwork features many nice presents that the animals have made, accompanied by little notes they wrote to one another. How thoughtful!
Every doll and animal is bundled in a complimentary bandana and tied with an ivory and gold ribbon before they ship out from our workshop. (You can learn our tried-and-true bandana gift wrapping method here.) These bandanas are excellent for sustainable gifting – customers often tell us that they like to reuse them to wrap their own gifts, or give them a second life by way of crafty projects. Bandanas also make the perfect dolly blankets for imaginative play; or you can even pin them to a wall as art. The options are endless ✨
A very exciting new development this year is our fancy printed tissue paper!
Sustainably printed with algae ink onto recycled paper, it features original artwork of the animals' many industrious tools; such as baskets, watering cans, scissors, paints, and more. Some of these items may be familiar to you from our storybook, The Gifts of the Year. This charming paper is used to wrap all of our doll clothing, accessories, and childrenswear.
For those who wish to truly elevate their gifting, we also offer the option to upgrade to a gift box.
A gift box fits one doll or animal, along with any doll clothing you may purchase for them. It is lined with our charming printed tissue paper, and includes both a collectible bandana and a sweet-smelling lavender sachet. Our classic ivory and gold ribbon is tied in a bow around this special gifting bundle. If you would like to add a gift note, we will hand write your message on a little card and tuck it under the ribbon.
Here are some favorable reviews about our packaging:
Gifting season is upon us! 🎁 The Hazel Village animals know all about giving presents, and they have taught us a thing or two. During the busy holiday season, our small team of workshop elves expertly wrap hundreds of woodland friends every week before mailing them out to your homes. Sometimes we hear from people who want to take a peek at their purchase before they gift it, but are worried they might mess up the nice wrapping. For that reason, and also just to teach you a nifty skill, we wanted to share our tried-and-true method for wrapping gifts in fabric.
We are demonstrating this method using Emma Rabbit and our Holiday 2023 collectible printed bandana. Every doll and animal purchase includes a complimentary bandana, which you can also reuse to wrap your own gifts. This year's original bandana artwork features many nice presents that the animals have made, accompanied by little notes they wrote to one another. Quite thoughtful, those animals ♥️
First, place your fabric in a diamond orientation with one corner facing towards you. Place your gift sideways in the center of the fabric.
If you are wrapping a doll, tuck all its appendages (arms, legs, tag, tail, ears if it has tall ears) in towards the center. If you are wrapping something else, you would make sure it was folded as compactly as possible here.
Wrap the bottom corner of your fabric around the doll, pulling tightly. Keeping your bundle nice and snug is ESSENTIAL for this method! If you are confident in your tight swaddling, your odds of burrito success are much much higher.
Fold one side corner over the doll, still pulling tightly.
Fold the other side corner. See how the bottom corners of this burrito are nice and snug? That is what you want.
Roll your bundle to the top corner of the fabric, and you should have a tidy burrito.
Now it is time to anchor everything in place with a nice ribbon.
We use the Tiffany bow method, which you can learn in this helpful video.
And with that, your doll is all ready for gifting!
We highly recommend exploring our website for your gifting needs this holiday season. If you are local to NYC or plan on visiting the area, you can also visit us in person and say hi. A Hazel Village animal makes a perfectly charming and cozy gift for friends of all ages! ♥️🎁
]]>Scurrying to her cozy house, Annicke got out the special box where she keeps her best bits of yarn. Snowy colors seemed the way to go, and she had a feeling that Princess Gertrude would like them. (It was only a hunch, but Annicke knows to trust her instincts.) She selected two colors of yarn: one icy blue, one silvery white. It was time to get to work!
If you would like to make a pom-pom garland too, read on to find out how Annicke made hers. Once you try this craft, you will discover that just about anything can be made delightful with the addition of a pom-pom!
What you will need:
Crafting tip: we recommend having a pair of scissors that is just for fabric and yarn. Cutting paper dulls scissor blades pretty quickly, and it is no fun trying to cut fabric or yarn with dull scissors. At the workshop we label all our scissors with PAPER or FABRIC for this reason. ✂️
Start by deciding how big you want your poms to be, and then cut a piece of cardboard an inch or two bigger. We wanted our poms to be about 1.5", so we're using a piece of cardboard that's about 3". Don't worry about being exact for this; it is a very forgiving craft.
Wrap your yarn around and around the cardboard. The more yarn you wrap, the denser your pom will be. Once you have a lot of yarn wrapped, snip the end.
Next, thread a piece of yarn underneath one side and tie a tight knot around the middle. We just bent our cardboard piece a little to make this easier, but you could also use a yarn needle if you have one.
Repeat on the opposite side.
Next, wiggle the yarn off the cardboard. The knots you just tied will keep it neatly together.
Now tie a new knot securely around the middle of the whole bundle, and leave the yarn tails long.
Poke your scissors into the tunnel made by the yarn loops on one side, and snip through it. Repeat on the other side.
When you fluff up the yarn, you will have a pom that most likely looks a little messy and uneven. There is just one more step to making it fluffy and round: start trimming!
Snip the yarn all over your pom until you are happy with its shape. Don't be afraid to snip boldly – you may want to cut off quite a bit of yarn.
It can be helpful to roll the pom between your palms to round it out as well. Try to avoid cutting those long yarn tails in the middle, because you will need them later.
You might notice that our poms are not all that dense, and you can still see the individual pieces of yarn. This is just a matter of how much yarn you wrapped earlier, and how much you trim it down. You can make your poms as shaggy or as tight as you would like.
When you finish your first pom, just repeat the process to make however many you want for your garland. We made nine.
Once you have all your poms, cut a long piece of yarn to string them together. Using the long yarn tails on each pom, tie them to your garland string. Then trim the long tails short to hide them in the poms.
Space the poms out evenly, and you have your pom-pom garland!
Annicke asked Phoebe Fawn and Arthur Lamb to help her hang up her garland. Phoebe told her friend how nice it looked. Arthur asked, "Will you teach me how to make a pom?" "Of course!" Annicke replied. "I have lots more yarn. We will have a pom-pom party." What fun!
If you would like to attend the Grand Ball of Princess Gertrude, keep an eye on our Instagram and email newsletter for her Hazel Village debut. She will be arriving on Wednesday, November 15th at 1PM ET! ❄️👑
Did you make this craft at home? Send us a photo or tag us on social media @hazelvillage! For any questions, please email us at hello@hazelvillage.com.
You might also like:
]]>
Hazel Village sits on a gently sloping hillside in the middle of the woods, with mountains to the north and a small lake to the south. There are a few ways one could find this secret place, but the main one is a small hole (like a groundhog’s) in a grassy bank next to a dirt road. It doesn’t look like much, and it is too small for most of us. But if you were to go into it, it would take you under the grassy bank. And when you stepped out on the other side, you would find yourself at the beginning of a path through the trees.
After walking along the path a little ways you would pass through the Mossy Bower: hazel trees that have grown into a wide arch, with a lush carpet of moss on the earthy floor and clinging to the trunks. Though the tunnel in the grassy bank is the first step to finding the animals’ home, walking through the Mossy Bower is really how you enter the Village.
If you kept walking on this path all the way through the Village, you would cross a stream by way of a footbridge and reach the Hazel Grove on the western side. This is a beautiful reflecting pool surrounded by mossy stones and hazel trees. The animals like to splash and play in the water, and also to sit on the mossy stones and contemplate.
There are a lot of meadows and fields in Hazel Village. The Night Meadow is where the animals have their Firefly Ball on the shortest night of the year. The Guest House sits in the High Meadow – this is where animals who are visiting the Village stay. There they can enjoy the gentle humming of bees in the beehives, and a nice walk through the orchard to reach the Lodge. The orchard has apple trees and pear trees. At the bottom of the orchard is a row of birdhouses the animals have kindly built for their feathered friends to rest in.
There is a boathouse on the lakeshore, with big rowboat and a long wooden dock. If the animals feel like taking a day trip, especially in the summertime, they will paddle across the lake to Thimbleberry Island.
In the middle of the Village is the Lodge. This is the animals’ main gathering place for feasts, major tea parties, elaborate projects, and such. It has a flagpole on the roof with a flag to indicate what the day’s weather will be. Oliver changes this flag every morning in his official capacity as weather mouse. There also seem to be little flags in other colors: pink, orange and blue. We’re not quite sure what those ones mean, but Oliver knows. There is a mailbox outside the Lodge where the animals leave letters and small presents for one another. Oliver also delivers the mail – he is quite the busy mouse.
The woodland friends of Hazel Village live in little cottages, each one made just how they like it. Gracie Cat’s house is built onto the Lodge. She likes living above the kitchen so she can cook a big feast anytime she wants, and also keep an eye on the food stores.
Phoebe Fawn’s house is tucked in a small clearing past the wildflower meadow. She likes to sit in the meadow and practice her compositions. The flowers here are good for bees and butterflies – lots of milkweed and clover, among other things.
Annicke Mouse and Flora Fox live next to each other, with a little garden growing between their houses. Here they grow herbs and dye plants for their projects. The things Flora grows are most often practically useful, while Annicke’s plantings are a little more strange.
Max Raccoon’s house is next to a hollow old tree, into which he has built special cubbies for all his trinkets. He keeps some trinkets in his house too, but the storage tree is important for maintaining the breadth of his collection.
Jeremy Owl lives in a cylindrical tower house, with skylights in his roof so he can have good light for his paintings even at dusk.
Lucy Owl lives across the path from Annicke and Flora. Her house is very cozy, but her particular favorite place in the Village is actually the Lookout Tree. She flies up there to observe all the creatures of field and forest going about their business.
Gwendolyn Raccoon lives by the lakeshore in the southeast corner of the Village. She has lots of yarrow growing around her house. She also has a spring fed mossy trough that runs right into the lake. It makes a gentle burbling sound.
Ella Toad lives on a houseboat, which she usually keeps moored close to the lake beach near Gwendolyn’s house. On warm breezy days she lounges on the roof of her houseboat, admiring the shapes of the clouds and catching the occasional bug.
Nicholas Bear Cub’s house is right next to the Tinkering Yard, because he does a lot of projects that require some space. This way he can easily move his supplies back and forth from his house to the yard in his little red wagon.
The bunny twins Emma and Penelope Rabbit have the biggest house, naturally, since they live there together. They have rocking chairs on their front porch and a rose garden in their backyard.
Juliette Rabbit lives between Nicholas and the bunny twins. She likes to gather pine needles from the trees next to her house, and make little pine needle sachet pillows to share with her friends so their laundry can smell fresh and good.
Oliver Mouse is growing dahlias all around his house. He’s doing a great job – the dahlias are thriving. Oliver also has a special ash tree in his yard; see ‘Trees of Significance’ further down for more on this.
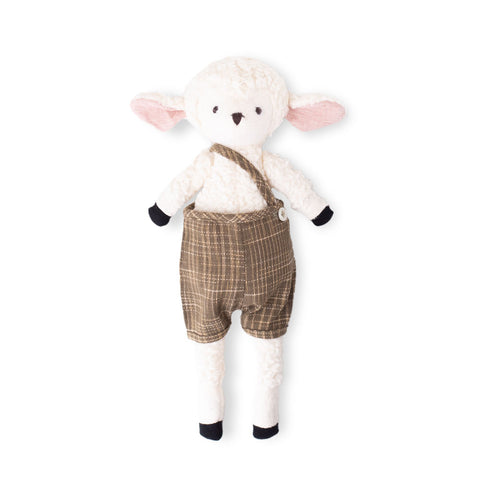
Arthur Lamb and Lucas Rabbit live in two little houses built side by side because they are the best of friends. They’re growing giant sunflowers, which are also thriving – currently they are taller than their houses’ roofs.
Zoe Rabbit lives right on the stream bank. She is converting the spot behind her house into a rock garden, with minnow pools in the lower levels and a terrace higher up. This is slimy work, so she will often take breaks sitting on her screened porch.
Owen Fox lives alongside the stream too, very close to the Hazel Grove. He also has a secret treehouse on the other side of the Village, in the woods to the east. It’s not a secret from the other animals, although they give him his space there when he wants it. This is a good example of how secret spaces can feel just as special even if all your friends know about them.
Catalina Mouse lives in a dugout at the foot of the garden near the lake beach. If you don’t know what a dugout is, it means the house is built directly into the side of the hill. Catalina assures us she keeps it just as neat as a pin.
Lewis Toad lives in a house on stilts in the reedy marsh. He likes the gentle creaking of the wooden boards as he walks along on the path over the marsh. Lewis usually just hops up to the deck, but he has a ladder for his friends to climb when they want to visit him.
Reginald Fox lives at the top of the Village garden, and tends to it every day. He has a barrel to catch the rain water that runs off his roof, so he can give it to any plants that might be a little extra thirsty. Here are some of the things the animals grow in their garden: corn, beans, squash, pumpkins, kale, chard, tomatoes, asparagus, and strawberries. There is also a long hedgerow of foraging bushes: elderberry, raspberry, and rose hips.
In the far corners and out-of-the-way paths of Hazel Village, Annicke Mouse likes to inspect the trails and leave messages for herself and her friends in the form of “trail trinkets.”
If you look closely, you can spot Annicke's trail trinkets on trees all over the Village.
The animals have three trees of particular significance. The first is the Present Tree, which sits atop Sledding Hill on the east side of the garden. It is a linden tree.
The animals adorn its branches with colorful ribbons to mark the different seasons. On the longest night of the year, they decorate it with presents for the birds and put their presents for one another underneath it.
The second tree of significance is the Record Keeping Tree, which is next to the Lodge. It is a beech tree. Here the animals make note of anything they consider important enough to record. For example, when Arthur Lamb returned to the Village to move in for good, the animals noticed that he was a little bit taller than when he first visited. In his official capacity as record keeping mouse, Oliver marked this fact.
The third tree of significance is the ash tree that grows in Oliver Mouse’s yard.
If you want to know the truth we’re not quite sure why it’s special yet, but we trust that it is. Even for us, the world of the animals still has plenty of mysteries...
We hope you enjoyed exploring Hazel Village! If you want to learn more about the animals' homes and day-to-day lives, we highly recommend our storybook The Gifts of the Year.
You might also like:
The Animals Make a Cozy Blanket for the Guest House
If you have any questions or just want to say hi, you can always reach us by email at hello@hazelvillage.com.
]]>One autumn afternoon, Arthur Lamb was sitting at the bottom of the Village garden and admiring the pumpkin patch when he had an absolutely wonderful idea. Jumping up on his tip toes, he shouted, “A pumpkin hat for my noggin!” Then he said, “Whoopsie-daisy!” for he had just startled his friend Reginald Fox who was tending the garden. Reginald said it was quite all right, so Arthur scooted off to gather the supplies he would need for his hat. What a perfect project for a cozy fall day!
🍂
If you would like to follow Arthur’s example, this blog post will show you how to make a felt pumpkin hat for your woodland friends. It is an excellent project if you are new to hand-sewing, because felt holds its shape well and is very easy to work with.
For more experienced sewists, particularly those who might have a machine, feel free to use any sturdy fabric and you will probably be able to whip this hat up very quickly indeed. If you go this route, we recommend finishing your seams to prevent fraying and adding some seam allowance for a rolled hem at the bottom edges of your pattern pieces.
Happy sewing!
What you will need:
Start by printing your pattern and cutting out the pieces. Trace each piece on your felt as indicated below. If you would rather make both the leaf and the stem in green, you can skip the brown felt.
For the B pattern piece, trace it once with the text on the pattern piece facing the fabric and once with the text facing away from the fabric. This will make sure that no pen or pencil marks show up on the front of the hat.
To begin sewing, thread your needle in orange. Here at the workshop we use this technique for tying quick knots; we highly recommend it!
Place two A pieces on top of one another and use a backstitch to sew them together along one side. Here is a quick backstitching tutorial. Your line of stitches should sit about 1/4” from the edge of the felt. Tie a knot at the bottom and cut your thread.
Open the piece you just made, and align another A piece with one of the un-sewn edges. Repeat the same method to sew this piece on. Here is how it should look:
Sew all five A pieces together this way.
Once all five 5 pieces are attached, it's time to sew a B piece on each side. Make sure that any pencil marks on your B piece are on the seam side of the felt, so they will be hidden inside the hat. Align it like this:
Stitch along one edge the same way you've been doing, and repeat on the opposite side with the second B piece.
Finally, sew your B pieces together at the top to connect the two sides of the hat.
The base of the pumpkin is complete! Now it’s time to make the stump. Thread your needle in brown, and stitch together the two C pieces around the sides and flat top. Do not stitch the bottom curve.
We sewed a little closer to the edges for this, because you will be you turning it inside out and you don't want the seams to be too bulky.
When you finish and tie off your thread, turn the stump inside out. This is a little tricky but you can use a pencil to help poke the fabric through.
Now is the time when a few pins will really come in handy if you have them.
Did you make this craft at home? Send us a photo or tag us on social media @hazelvillage! For any questions, please email us at hello@hazelvillage.com.
You might also like:
What you will need:
First, print out this handy downloadable template. Cut it out on the solid lines and trace it onto your cardboard. (Tip: stick the template to your cardboard with a little roll of tape to keep it in place while you trace.)
Remove the template and use your ruler to transfer the dotted lines onto your cardboard. (We forgot to draw the X but we added it later – it marks where you will sew a button.)
We happened to have some fancy paper here at the workshop, so we glued our cardboard to the back side. You could find similar paper at your local craft store or stationary store; wrapping paper would work too, or probably even fabric. If you would rather skip this step, you can paint your trunk instead – there are no rules!
Cut out your box along the solid lines. Here's the back side of ours with the fancy paper!
Fold the cardboard inwards along the dotted lines.
You might notice that your corners are a little uneven. That's ok, ours were too. Mark the spot, then trim it down so your corners are snug.
(We recommend using a pencil for this craft, but our resident crafting elf could only find a pen.)
Apply glue to the tabs in one corner at a time. Hold the corner snug and press firmly for a moment to let the glue set, then secure it with a binder clip or paper clip while it dries.
The big rectangle will be curving to make a domed top. To achieve this, press against your work surface to curve the cardboard bit by bit.
Glue one strip along the inside, folded over the edge.
Did you make this craft at home? Send us a photo or tag us on social media @hazelvillage! For any questions, please email us at hello@hazelvillage.com.
You might also like:
How did you get interested in basketweaving?
There was this meadow across the street from where we were staying in south Jersey in 2020. It was in the backyard of a church and connected to the back field of an elementary school, and there was no one at either due to lockdown. Spring was coming in and my kid was about one, and every day I would take her in the sling for her afternoon nap and we would walk around the edges of the field.
I would look at all the plants in the hedges, and one-by-one go down rabbit holes about them. Sassafras, wild grapes, black cherry trees, black walnuts, oak trees, sumac…just like, all these things. One was a willow tree that was mostly blown down, but it was re-sprouting, because that’s what they do. I got a bunch of shoots and wove them green into a tiny, birds’-nest looking basket.
Later I learned that you can get actual basket willows. It grows as a shrub rather than a tree and it sprouts each year, that’s how you maintain it. I found this place in Ohio called Living Willow Farm and Howard sold me all this dried willow. It came in a big UPS box.
I had to figure out how to soak the willow living in an apartment; Howard told me you can get a big PVC pipe and cap one end, and put your bundle of sticks in there. So you soak the willow sticks and then you can weave them. And I got really into it. I learned how from this book [Willow Basketry: a How-To Guide by Jonathan Ridgeon]; I just followed the instructions and started practicing. The first thing I made was a binky basket for my kid.
Can you speak to how it was being a beginner, versus where you are now?
So, I’m not that good at it at all. But you know, it’s like anything – every time I do it, something gets better and I learn a little something, get more of a feel for it. I like it a lot as crafts for fun go, it really suits me. The amount of time it takes to make a thing – it’s faster than knitting, it’s more like knitting chunky gauge. It smells great. It’s a nice combination of outside stuff and inside stuff. It rewards going rogue, but if you want to be precise it will come out beautifully too. I like that aspect of it.
We know you have big feelings about willows, will you tell us about them?
Yes! Most people I meet who like this sort of thing often don’t know what kind of sticks it is or why it matters. We’re so disconnected from it, for something that has been so close to us for so long. And I could get bummed about that, but what’s the point when it’s actually just exciting? Willows have potential to help with so many pressing problems in our land management and the way we are on the earth. They thrive on wet marshy ground and they’re really good at absorbing runoff and filtering out stuff that would be harmful to the water by converting it into biomass. There’s a company in Canada that will make a field of shrub willow to be your industrial wastewater treatment plant, and they get it up to the legal requirements of how clean the water comes out. They also harvest the willow and make big woven panels for highway sound insulation. Whenever I hear about problems dealing with wastewater, I always wonder, has anyone tried this?
What’s one thing you’ve learned from this craft?
An ongoing challenge for me is that it makes you plan a week ahead and then give it like half a day of sitting making baskets. Because you have to soak the willows and then actually get it done before they dry back out. Maybe pottery is similar in some ways; just being patient and having foresight with how long it takes to do its thing. That’s something I’m still learning.
Do you have thoughts on how this basket weaving passion relates to Hazel Village and the world of the animals?
Well, now they have willows on their map. I learned more about it since I made their first map. And it’s totally the sort of thing they would do. It’s in their world now. They could probably do giant basketry birdhouses or huts dangling from a tree branch.
When you went to Peru to visit our artisan partners, did you learn anything from the weavers there?
Yes, I did! What they’re doing is similar but the palm straw they weave with will do things that willow sticks won’t. The way that they start the center doesn’t exactly work with willows, but it was cool to see. They work on a wooden mold to make any hat, including our dolly hats. I don’t usually do that, but sometimes I will find a bowl to work around and it usually turns out well. I learned how fast you can be. It was just fun, like, we do this! We’re humans!
Tell us about Stakeholder Basket Club!
So, I don’t want to do another whole business. I have one, I’m content. But this feels like an art project, or a social mission. I got willow cuttings from that same guy in Ohio and I’m growing them here. They’re doing just alright, but I hear they really get going in the second year. I also gave them out to so many friends around the region for them to plant. And I started a club that’s free basket weaving in the park. We’ll probably find other locations once it gets cold. I really want people to show up! I have so many willows still in my basement. It's for all ages, adults and kids; kids age 5-10 seem to be really into it. It depends on the temperament of the kid, but kids who like to make things, they get it. It’s a thing we can do together as humans that is great on many fronts.
Farms
Thank you for reading, friend! ♥️🌱
Did you make this craft at home? Send us a photo or tag us on social media @hazelvillage! For any questions, please email us at hello@hazelvillage.com.
You might also like:
Questions? Feel free to email us at hello@hazelvillage.com!
You might also like:
First, our head elf Jane decides what kind of animal will be visiting the Village next. She consults with our team to consider the animals that have visited in the past, as well as the animals that are often requested by our customers. Both are important factors to consider, but ultimately, she follows her heart!
Every Hazel Village animal has a little story. Whether they are a permanent resident or a visiting friend, character comes first. Here is Florence Bat's story:
Sometimes, gliding among the starlit trees, Florence hears the soft wavelets of a forest pool. And sometimes she settles by the mossy bank for a minute, snacking on night bugs and thinking about this and that: her cozy cave, when the moon will rise, her new hat with flowers on it.
Once she has an idea of a new animal's character, Jane sketches the design and our resident sample maker here at the shop starts bringing them to life. Here is one of Jane's sketches of Florence:
Some animals are approved on the first or second sample, while others require more tinkering before we're sure we have it right. We tried several different pattern designs for Florence's face before we chose the final version – bats are tricky!
Limited-edition animals offer an opportunity for us to play with extra special details. For Florence, naturally, this was her wings! We experimented with different materials and decided that linen was the way to go, because it offers a fitting delicate bat-wing quality. (Did you know that real bats have translucent wings?)
We explored hand embroidery versus machine stitching for the wing details, and chose hand embroidery because it just felt right. These fancy wings did increase Florence's production cost from that of a regular animal, so her retail price needed to be a little higher. We think she's worth it!
One of our favorite things about Florence is her pointed toes. No other animal has had this foot shape before – Florence is a pioneer! We also tried a version where she had little claws for gripping onto branches, but we decided it was a bit too creepy for a cuddly stuffed animal.
Once we have a final sample for a new animal, we send it along to our artisan partners in Nepal who make all our dolls and animals. Jane happened to be visiting the team there earlier this year, so she was able to carry Florence's sample and meet with them in person to discuss her production. Here are some photos of Jane chatting with Manjita about Florence's special wing pattern:
While production gets rolling for a new animal in Nepal, we keep working on designing and sampling any special doll clothing and accessories that the animal might be bringing with them. Take a look at the design board for Florence's collection:
We keep one of these boards for every collection we release, and it is always a working document. It starts as a big piece of paper that Jane brings in with her initial sketches. Later she will add color, and we will add notes for specific product details as they're decided. Jane often cut outs designs or glues in new ones to keep the board current as things change.
Collections often change quite a bit between design and production. Ethically manufacturing handmade doll clothing and sourcing high-quality materials is a complicated business! You may have noticed that the design board is not quite up to date with Florence's final collection. For example, her pocket suspender leggings ended up being gray cotton rather than green. And see that full moon sweater next to the mini frog? We learned it wouldn't be possible to make enough of this design in time for Florence's launch. But fret not – it will be coming along later this year.
Sometimes certain items require special original artwork. Florence's Cloak of Night features Jane's original watercolor painting, and the bug-print artwork for Florence's camisole and bloomers was made by our talented workshop elf Sara!
When the collection's production is complete, it's time for our workshop team to get ready for the new animal's launch. Taking lots of cute photos of everything! Putting together newsletters and marketing content! Writing up descriptions for all the details of each item! Snipping threads! Preparing the items to ship out! All that and much more.
When it's finally time to send Florence Bat from our workshop to your home, our packing elves will carefully bundle her up in a collectible bandana and tie it with an ivory-and-gold ribbon. We will tuck this cozy bat bundle into your package along with a special postcard. You can see Jane's original illustration for Florence's postcard below.
And that concludes the behind-the-scenes journey of a Hazel Village limited-edition animal! ♥️
You may also like:
All About Limited Edition Animals
Meet San! Behind the Scenes of our Cambodia Production
Sustainability at Hazel Village
Feel free to email us any questions at hello@hazelvillage.com!
]]>Hello, friends of the Village! We’ve assembled our top 7 most helpful tips for shopping Hazel Village limited-edition product launches. You can follow announcements of upcoming collections via our email newsletter and Instagram @hazelvillage.
If you’ve been here for a while, you will know that sometimes our new products can sell out fast. In recent years we’ve worked hard to make more of everything, so quick sellouts are more rare these days! However, we are still a small business with limited capacity and we do still see certain popular limited-edition items sell quickly. Since in most cases these products do not restock, we recommend following the tips below to make sure you can get your hands on any items you love!
Setting a calendar alert on your phone for 10 minutes before launch time is a great way to make sure you don’t forget to shop. You can also sign up for our text alerts – AKA Oliver Mouse's Messaging Service! A few minutes before launch time, head to our website and log in to your account. The collection page for each new drop will always be linked at the top of our site navigation.
Having your payment details and default address pre-loaded is a huge help for checking out fast! We recommend using Shop Pay. We promise this is not an advertisement - we’ve just seen for ourselves and heard from many customers that using Shop Pay is the best way to shop our launches. You can check out speedily, and be confident that all your details are correct and secure!
Important note for Hazelnuts: if you have scheduled a virtual shopping appointment, make sure to place your order using the SAME EMAIL under which you booked your appointment.
We appreciate when you are able to condense your purchases into a single order. However, if you place multiple orders back to back our fulfillment elves will combine them into one shipment. This way if you’re especially hoping for a certain item, (such as a very fancy hat), you can check out quickly with that item and then go back to shop more leisurely for anything else.
Every limited-edition collection page features a handy ‘Buy Full Collection’ button at the top. This button will add all in-stock items to your cart. Make sure to refresh your page so that the full collection has loaded before clicking the button. If any items have already sold out when you are shopping, or if they sell out during your checkout process, they will not be included in your order.
To add a hand-stitched monogram to any doll or animal, go to their product page and scroll down to ‘Monogram and Gift Additions.’ Click ‘Add a Monogram’, select your letter, and then add the doll to your cart. If you want to purchase a monogram but forget to do so when placing your order, please email us right away at hello@hazelvillage.com. For high-volume launches such as the release of a new limited-edition animal friend, we may not be able to accommodate adding a monogram to your purchase after the fact. However, you are always welcome to send a woodland friend back to our workshop to add a monogram at a later date.
All limited-edition products will have a purchase limit (ex: 2 of each item per household) stated on the product’s page. You will not be able to check out if the items in your cart exceed a purchase limit. Please don’t hesitate to email us if you have a special circumstance – such as needing to purchase an extra for a family member or friend who is unable to shop themselves – and we will be happy to make an exception. We share these purchase limits in advance via both our email newsletter and our Hazelnut-exclusive collection previews, to help you plan ahead before you shop. If an item remains in stock for 1-2 days after its release, we will always lift the purchase limit so you can go back for more if you would like.
You will be sent an automatic confirmation email when you make a purchase. Make sure to look over this email and confirm that both your order and your shipping address are correct. If you see any issues, email hello@hazelvillage.com or call us at 929-237-6941. We’ll help fix it straight away! Please keep in mind that we cannot be responsible for delivery issues if an incorrect shipping address is entered at checkout.
If you made it all the way down here, thanks for reading! In return, Gwendolyn Raccoon would like to offer you a jam tart.
BONUS TIP: Missed out on purchasing a limited-edition item? You can email us to be added to a waitlist! We usually end up with a few extra pieces, and we always make sure any friends on the waitlist get first dibs.
You might also like:
All About Limited Edition Animals
Meet San! Behind the Scenes of our Cambodia Production
Hazelnut Community Spotlight ♥️
Feel free to email us with any questions at hello@hazelvillage.com!
]]>After breakfast, we find a beret
To give her when she wakes - hooray!
Hint #3
Now that the milkweeds are in full bloom, the animals of Hazel Village are quite enjoying promenading through the meadows in their butterfly wings. Owen Fox is hoping his energetic dance moves will be inspiring to the butterflies who are still working on emerging from their cocoons. He is planning to choreograph an elaborate performance, the theme of which will be “supportive flapping”. When he told Annicke Mouse about his plan, she had a great suggestion: “Let’s make some butterfly wands to dance with!”
Annicke remembered how much fun she’d had painting butterflies with Jeremy Owl to make a field guide, and how Jeremy had cut out his butterfly artwork and used some sticks and strings to make a mobile. She figured a similar method would be perfect for making butterfly wands!
Owen and Annicke found a nice spot in the tall meadow grasses and sat down with their craft supplies. When Gwendolyn Raccoon happened to trundle by, they invited her to join them. “Gee, thanks!” said Gwendolyn. The three friends sat peacefully observing the butterflies that flitted around them in the summer breezes, and drawing their pictures.
Here are all the butterflies the woodland friends drew! Some are based on real butterflies and some are from their imagination, which is just as nice.
The animals carefully cut out their butterfly pictures and used some tape to attach them to the ends of twigs. Owen gave an experimental flourish of his Swallowtail butterfly wand. “This will spark my creativity!” he declared.
Gwendolyn, Annicke and Owen spent the rest of the afternoon practicing leaps in their wings and waving their butterfly wands with vigor. What fun!
You can use this coloring page to create your own butterflies. If you'd like to make a wand we suggest finding twigs that are already on the ground, rather than cutting them off a live tree. We bet your local park would have some branches you can forage, and be an excellent place to practice your butterfly moves!
Gwendolyn says her Monarch butterfly wings make her feel positively regal, and her wand also functions as a royal scepter. Fancy!
We highly recommend making a butterfly mobile too, and taking a gander Annicke's field guide if you would like to learn more about our wonderful pollinator friends.
Shop butterfly wings for dolls on Wednesday, June 7th at 1PM ET!
Did you make this craft at home? Send us a photo or tag us on social media @hazelvillage! For questions, please email us at hello@hazelvillage.com.
You might also like:
]]>This past April, we traveled to Cambodia to visit with our artisan partners there and check in on how their projects were going. During our visit we sat down with San, who runs our Cambodia production, to chat about her work and her story. We’re so excited to share some of this conversation with you! But first, let’s catch up a little bit on the history of our ethical production in Cambodia.
We started making things in Cambodia in 2018, when we learned about a company called Friends-International through the NGO grapevine. The branch of Friends that we worked with operated in Phnom Penh, Cambodia, where they provided social services for street kids and provided their parents with safe & fairly paid employment in textile jobs. It turns out it’s easier to make your kid go to school, if you aren’t worried about putting food on the table. Friends’ social mission was very impactful, and we were so excited to partner with them.
Unfortunately, when the pandemic hit in 2020 and a tidal wave of global complications ensued, Friends closed down operations in Cambodia. This left us in a logistical bind, but much more critically, it left 17 people in Phnom Penh about to lose their jobs.
As soon as we found out that Friends had decided to close, we asked who of the team was staying. We learned that San had been working from home, and she had a group of women working with her. So we asked her what she needed, what we could do for her to help her keep it going, and we came up with a plan.
We were able to provide San with the funds to open her own shop. This meant giving advances on future orders to help cover the starting costs, and planning ahead to make sure she would be able to continue operating. We’re very proud and grateful to say that thanks to this partnership, all 17 people including San have remained steadily employed.
San spoke to us about how she had imagined that she might one day have her own business, perhaps working from the house that she had asked her husband to build for her. She had thought of this as a potential later in life prospect, a hopeful long-term plan. As it turned out, the plan became a reality much sooner than she had imagined.
San's workshop is on the top floor of her house. 14 people work there, and 3 others who live farther away work from their own homes. Since the workplace conditions are not hazardous in any way, San allows those of her employees who don’t have childcare to bring their little ones into work with them. The kids play with each other and with San’s own kids in her home while their parents work. We know firsthand how valuable this kind of safe workplace environment can be when it comes to community support for childcare – Jane’s (now 4-year-old) daughter has been a regular presence in our Brooklyn workshop since before she could crawl.
San has a long history of working with NGOs – training, mentoring, and teaching sewing. While many of her team received an initial training through Friends, San provides them with ongoing instruction. With her expertise guiding them, the quality of work that San’s team produces is truly exceptional. They are currently making all of our mini animals! We’ve been able to make these mini animals more special, with increasingly complex pattern designs, because we know that San and her team have the skills to bring them to life in production. Here's just a handful of the tiny critters they’ve made for us over the last few years:
During our visit the team was busy sewing a big batch of mini tree frogs. It was so great to see their beautiful work in action. (These froggies will be hopping onto our site in June, so be sure to keep an eye out!)
In addition to mini animals, San's team is usually working on some doll clothing. We often assign production of more elaborate items to her team, such as these excellent veggie costumes from last fall!
San spoke about how important it is for her to feel that the customer believes in her.
Jane: Anything complicated with handwork, we know we can trust you to make it beautiful.
San: *laughing* I don’t think so!
Jane: Spoken like someone who’s good at what they do!
Running her own business is not without its challenges. San shared that it can feel scary to be responsible for so much herself, as opposed to being an employee.
Jane: Making that transition in your career was very, very brave.
Right now she has one other smaller client, but we are her primary customer. Though of course we aren’t planning on going anywhere, we understand the pressure of having so many eggs in one basket. A major element of this partnership involves constantly planning ahead and timing everything with care, so we can make sure we are ordering enough units to keep everyone supplied with work. San told us that for herself and her employees, knowing that this work is reliable and isn’t going anywhere is not only reassuring but motivating.
San: We love this job because, who can give us this chance, right? I can say that it’s a good time for me and I’m very lucky.
This story of local empowerment and economic development would not be possible without your support of Hazel Village. If you didn’t choose to shop for thoughtfully designed, environmentally sustainable, and ethically handmade toys, we wouldn’t have the funds to create this kind of employment for San and her team. We are so grateful to you for supporting our small business and helping us take good care of our world and the people in it. THANK YOU!
You might also like:
Jane Interview Zimmerman Shoes
Interview with Design Intern & Workshop Elf Sara
Feel free to email us with any questions at hello@hazelvillage.com!
]]>One perk of being a Hazelnut is admittance into the exclusive Hazel Village Hazelnuts Facebook group. This group is a wonderful community space for the biggest fans of Hazel Village to:
This group is always buzzing with so much fun and creativity that we wanted to share a little bit of it here on the Village blog. So we asked Hazelnuts in the Facebook group to tell us some of their favorite things about this special community. The animals always say, 'Industry and good cheer, every day and every year!' – and the Hazelnuts certainly abide by that motto!
"I think my most favorite part of being a Hazelnut is the buzz, clue-gathering, and speculation when a new or visiting villager is preparing to be revealed! The clues are so fun and the entire Hazelnut community joins in with their best guesses! I also very much admire and appreciate the crafts, clothes, and homes the Hazelnuts have created and curated for their villagers."
For any questions, please email us at hello@hazelvillage.com.
You might also like:
Fun fact: Jane originally illustrated these party hats & birthday banner for snail mail postcards we sent out back in 2018. These days we're usually too busy to send out much snail mail, but we love to share extra goodies with you here on the Village blog! ♥️
Start by printing out this PDF. If you have access to a color printer, great! If you don't, no need to fret - printing these hats in black & white just means you now have an awesome coloring opportunity.
Cut out all the pieces, and assemble the hats by folding on the dotted line and taping or glueing along the tab to form a cone shape.
Each hat has 2 small white circles marked at the bottom, which you can poke through to thread some string for a chin strap. (We used a needle and embroidery floss, but you can use anything pokey and any string.) Tie a knot on the inside of the hat to keep the string from falling out. Cut the string tails long enough to tie under your animals' chins.
Assemble the banner by poking through the circles and threading each leaf along the string.
Now it's time to party! 🎉
Did you make this craft at home? Send us a photo or tag us on social media @hazelvillage! For questions, please email us at hello@hazelvillage.com.
You might also like:
]]>Last year, we made the change to 100% recyclable packaging. All our orders are shipped in recycled or low-impact boxes & envelopes, and secured with water-activated paper packing tape. The custom artwork on our packing tape is even printed using algae ink, which is a wonderful sustainable alternative to traditional black carbon ink.
Our packaging is also plastic-free! Dolls and animals are wrapped in cloth bandanas, and smaller items are wrapped in recycled tissue paper or muslin bags.
Customers often tell us that they regularly reuse our printed bandanas to wrap gifts, or give them a second life by way of crafty projects. Here's a beautiful dolly quilt, made by Shannon from a bunch of old HV bandanas!
We source organic and/or recycled fabrics whenever possible. All of our dolls and animals are made from organic cotton fleece. Recently we made these three dolly graphic tees from 50% recycled cotton and 50% new organic cotton. Aren't they lovely?
We minimize waste in all our production. We're always taking stock of whatever extra materials we may have, and thinking up creative ways to use them for new pieces. In January we released a full collection dedicated to this scrappy goal. You can read more about the making of the Patchwork Collection in this interview with our design intern Sara!
We source botanically dyed textiles whenever we can. For example, the red and yellow articles of clothing shown below were made in Peru and dyed by the Shipibo-Conibo people who live along the Ucayali river in the Amazon basin east of the Andes. They specialize in textiles, especially dyeing fibers using the bark of local trees - in this case, mahogany and mango trees.
We provide Doll & Animal Hospital services for preserving well-loved friends. Our hope is that these toys will be played with and loved for many many years, and never end up in a landfill.
Above all, we source all our products with care for the Earth and the worker. When you shop with us, you're supporting our supply chain that empowers talented artisans around the world with dignified, skilled work and fair wages. You can read Our Story to learn more about these partnerships and our commitment to ethical production.
Thank you for reading, friends! Please don't hesitate to email us at hello@hazelvillage.com if you have any questions or just want to say hi. As the animals would say, "Industry and good cheer, every day and every year!" ♥️
Reginald's garden on the Hazel Village map
One sunny morning, Reginald Fox was watering his garden and admiring the spring vegetables when he had an idea. "I wonder if I could use these beautifully colored veggies to make some nice paint for my friend Jeremy Owl?" Reginald decided to try. Follow along and make your own!
Reginald chose raspberries, carrots, spinach, and red cabbage. (Full disclosure: some of these fruits & veggies aren’t yet in season, so we’re not sure how Reginald got his paws on them. Maybe he had some stored from last year. Anyway, we bought ours at the grocery store.)
When choosing your fruits and veggies, we recommend experimenting with what you have at home - this would be a perfect craft to make use of some food scraps! And since this paint is edible, it would be a great project for little ones who like to put everything in their mouths. We don’t recommend making more than you plan to use for your artwork though, since it will not be shelf stable. Also, it's pretty sticky.
🌱
First, boil a kettle of water. We also recommend sifting your powdered sugar to minimize lumps. IMPORTANT: if you yourself are a kid, make sure to ask an adult for help with boiling water and chopping things!
To make your produce paint, there are basically just two simple methods: one for fruits, and one for vegetables. We listed how we made each paint color below. We're also including the measurements we used, but exact measurements aren't too important here.
Place 6 raspberries in a strainer over a jar, and thoroughly smush with the back of a spoon to get out as much juice as possible. Mix the juice with 6 teaspoons of powdered sugar.
Grate 1/2 cup of carrot. Pour some water over it, and let sit for 5-10 minutes. Strain the carrot liquid into another bowl, pressing the grated carrot with the back of a spoon. Mix 1-2 teaspoons of the carrot liquid with 6 teaspoons of powdered sugar.
Finely chop about a cup of raw spinach. Pour the water over it, then let sit for 5-10 minutes. Strain the liquid into another bowl, pressing the chopped spinach with the back of a spoon. Mix 1-2 teaspoons of the spinach liquid with 6 teaspoons of powdered sugar.
Finely chop about a cup of red cabbage. Pour some water over it, then let sit for 5-10 minutes. Strain the liquid into another bowl, pressing the chopped cabbage with the back of a spoon. Mix 1-2 teaspoons of the cabbage liquid with 6 teaspoons of powdered sugar.
TIP: When you pour water over your chopped veggies, only use a little bit. We tried to pour just enough that we could see the water line, but not so much that the veggies started to float. If you add too much water, the color will be less concentrated.
Reginald found some empty jars in his cupboard and poured the garden paint into them for storage. Then he packed them up in his picnic basket, and carried it to Jeremy's house.
Jeremy was thrilled. "What a thoughtful present!" he said. "I will paint with these right away."
Reginald felt wonderful as he scampered back to his own house. Jeremy did indeed set up his easel right away. After considering the colors he had to work with, he decided to paint a meadow at sunset. "When I finish this piece," Jeremy said to himself, "I think I will give it to Reginald."
Did you make this craft at home? Send us a photo or tag us on social media @hazelvillage! For any questions, please email us at hello@hazelvillage.com.
You might also like:
]]>In the meadow full of tasty green grass, Arthur Lamb shares his toys and plays nicely with his friends Lucas and Puffy: kites, tag, and Baa-Ball. He snacks on grass and bonbons whenever he gets hungry.
Friends, let us tell you the tale of a very special lamb. First, a little history: for the last nine years or so, we have had a permanent collection of 20 animals who call Hazel Village home. These are the woodland friends that Jane dreamed up back in 2010, when she started sewing everything alone in her bedroom in Brooklyn.
Jane in 2013 with Gwendolyn Raccoon
She made some changes here and there - a few animals were retired early on, like Mortimer Mouse, and a couple were added in the early years, like Lucy Owl and Phoebe Fawn - but since 2014, the residents of Hazel Village haven’t changed.
Hazel Village friends in the workshop in 2016
Jane knew there was a limit to how many animals could live in the Village, and if she ever added more there would be a clear expectation that they were simply visitors passing through. These days the animals welcome 4-5 visiting friends each year. Visiting animals might stick around the Village for a few days or a few months before departing to continue their adventures elsewhere. But a certain little lamb came along who captured everyone’s heart, and we just had to make an exception for him.
Arthur's original announcement on Instagram
Arthur Lamb first visited Hazel Village in March of 2022. At his initial release on our website, he sold out in eleven minutes - the fastest of any limited-edition animal ever!
Our Marketing Director Raquel's launch day post on the Facebook group for our customer loyalty program
We knew immediately that this little guy was special. We restocked him over the summer, and he stuck around until that fall. When he finally bid goodbye to his friends at the Village, we were sad to see him go. So sad in fact, that after much discussion we decided to do something we had never done before: bring him back for good.
The first order of business was for Crystal, our Director of Production, to work her magic and make sure that we could add Arthur to the production schedule for our talented artisan partners in Nepal. (If you'd like to learn more about our ethical manufacturing partnerships, click here!) Next, there was one important change to make. Although he was made using the same basic pattern that we adapt for all our animals, Arthur turned out smaller than the other woodland friends. Here's a side-by-side photo with Max Raccoon for comparison:
We learned that this was because Arthur's natural cotton sherpa fabric stretches differently than our usual organic cotton fleece. While this smaller Arthur was very sweet and special, we received feedback from our customers that his shorter stature made it difficult for our doll clothing to fit him well. Since it is important for our business and our customer's convenience that all the Villagers be able to share doll clothing, we decided to adjust this when we put Arthur back into production. So we scaled up his pattern, and reviewed several samples.
It might be a subtle difference, but we're glad that this update will help make sure that all our doll clothing fits Arthur as nicely as it fits the other dolls & animals. We like to think that Arthur maybe just grew up a tiny bit during his time away from the Village. Now he can share his favorite outfits with all his friends!
Jane completed two important projects to welcome Arthur as a permanent resident of Hazel Village. First, she drew his portrait.
Our next collectible bandana will feature Arthur's portrait alongside all the other animals. This bandana is currently in production and will be available soon.
Second, she added his new home to the Village map!
When Arthur first stayed at Hazel Village, his best pal was Lucas Rabbit. Naturally when Lucas heard that Arthur was coming back to stay, the first thing he did was gleefully hop up and down a bunch. But right after that when he had calmed down a little, he insisted that Arthur move in next door to him. The woodland friends all pitched in and helped build Arthur a cozy home next to Lucas's. How welcoming!
Arthur Lamb will be available on Wednesday, March 29th at 1PM ET. In keeping with the signature style that he brought to the Village last year, Arthur's returning outfit is a new pair of one-strap overalls.
Mossy One-Shoulder Overalls - $14
These winsome overalls were handmade in Cambodia from beautiful hand-loomed cotton fabric, made by the artisans of FairWeave with natural botanical dyes. The muted deep green is dappled with light checks woven into the fabric, and reminds the animals of a mossy forest floor when sunlight is peeking through the canopy. Single strap with a real shell button allows for ideal range of motion when romping and playing. Velcro back closure.
For this launch, there is a limit of ONE per household for both Arthur and his overalls. We will of course be restocking Arthur if he sells out, but a restock will take some time so we want to help make sure he doesn't sell too fast right away. Arthur's overalls will not be restocking. This purchase limit will be lifted after the first two days if items remain in stock.
Welcome back forever, Arthur!!
You might also like:
All About Limited Edition Animals
Interview with Design Intern & Workshop Elf Sara
Feel free to email us with any questions at hello@hazelvillage.com!
]]>This year the animals decided that two Egg Day Bunnies are better than one, and gave the title to Zoe Rabbit and Lucas Rabbit! (We're not sure how that worked out with the whole drawing straws thing, but since Lucas is Zoe's younger brother he often likes to tag along with her.) Follow along with Zoe and learn how to make an Egg Day Honorary Egg Sash for your Hazel Village animals!
What you will need:
First, cut your ribbon to 12” long. Trim the ends at an angle for maximum el-egg-ance.
Place your button at one end of your sash, leaving some room at the bottom. Mark a dot on either side of the button, then draw a line between the dots.
Use your scissors to carefully snip along the line you marked, creating a slit.
Stitch around the edges of the slit to make the buttonhole. We recommend following this handy buttonhole tutorial.
Repeat as many times as you would like for flowery splendor!
Next, mark a dot on the back half of the sash, centered inside your buttonhole. Poke your needle through the mark and sew the button on the other side.
The button should sit on the outside of the sash, just like the outward-facing side of your embroidery. Here's a tutorial on how to sew on a button!
With the sash folded in half, write ‘Eggs’ in the center of the front side using your pencil or marking pen. (A marking pen will vanish once a little water is applied - we always use these in our workshop when we are adding hand-stitched monograms to dolls & animals.) Make sure to leave some space between the end of the word and your buttonhole.
Embroider over the word using a backstitch.
Zoe decided to finish sewing her sash outdoors, since the spring day was so lovely and inviting. She took her picnic blanket to the Day Meadow and settled down in the fresh breezy air. Once she had stitched over all her letters, she added some pink petals to embellish her sash’s decorative buttonhole even further. Then she was done!
Just as Zoe finished her sash, Lucas scurried up to her. He was a little bit muddy from building swamp forts, which is his favorite rain-or-shine activity. When he saw his sister’s sash, Lucas said “Wowee! Can I make one too?” So Zoe kindly helped Lucas make his own special egg sash. Lucas did his in capital letters, because he’s not quite confident in cursive yet. He also added a big egg for emphasis. Now these bunny siblings are all ready for their Egg Day celebrations!
Did you make this craft at home? Send us a photo or tag us on social media @hazelvillage! For any questions, please email us at hello@hazelvillage.com.
You might also like:
DIY Nature Craft: Annicke and Jeremy's Butterfly Mobile
]]>When spring begins to spring, the Hazel Village animals play their noisiest instruments to wake up their hibernating friends. They sing, just as loud as can be: “WAKE UP! WAKE UP! TIME TO WAKE UP!”
As the Village Orchestra conductor, Phoebe Fawn likes to take the lead for any musical extravaganzas the animals put on. Today she decided that her friends could use a new instrument for their band: a bell! Phoebe knew just which animal to ask for help with this project: the Village’s resident potter, Lewis Toad. See how they did it!
What you will need:
Lewis prefers to gather his clay directly from the muddy banks of the Village stream, but we recommend that you use any kind of kid’s craft clay. We opted for air-dry so we wouldn’t have to get an oven involved. The clay we used was a bit old and stiff, so we dipped our fingers in water and kneaded it for a few minutes to get it nice and soft. We advise following the instructions on your clay’s package.
When your clay is workable, roll it into a ball between your palms. Then place it on a flat surface and roll it out with your rolling pin.
Take your clay circle and drape it over your handle mold. Gently squish the clay down around the handle, using water on your fingertips to help blend it together. You will probably have some lumps and bumps, but Lewis says there’s nothing wrong with a lumpy-bumpy bell.
When you’ve formed the clay into a dome shape, gently wiggle the mold out. You can go over the rim and the inside of the bell with your fingertip and more water to smooth it out if you want.
Make a smaller ball of clay to be the clapper (the part that swings inside the bell). Take your poking device (we used an embroidery needle) and poke a hole through the clapper ball, then another through the top of the bell. Make sure the holes are big enough for your string. Lewis decided he wanted to add a small decorative bead on top of his bell, so he made a tiny ball and poked a hole in that too. Phoebe thought this was a nice idea, and did the same.
Phoebe and Lewis set their bell pieces on a shelf to dry. It took a few hours, so while they were waiting Phoebe showed Lewis a new song she’s been practicing on her pan flute. When the pieces were dry, it was time to decorate!
Phoebe appreciates a classically beautiful instrument, so the friends decided to keep their bells traditional and paint them gold. Lewis thinks he might get a little more creative next time, but the gold is nice too. After the paint dried, the bells were finally ready to assemble.
Tie a knot at one end of your string, then thread your clapper bead up to the knot. Tie another knot to keep the clapper in place. Then tie a big knot higher up on the string - the placement will depend on how high or low you want your clapper to hang inside the bell. We tied a knot about 3/4 inch above the bead.
Thread the string through the hole in the top of your bell, and add the little decorative bead if you made one. Then tie a nice big tight knot to keep it snugly in place.
Finally, make a loop handle and tie another knot, then cut the excess string. You’re done!
Since these bells are clay they don't exactly tinkle the way a jingle bell might, but they make a pleasant clattering sound that Phoebe says is just as nice. Phoebe and Lewis decided to give this set of bells to the animal they know who most appreciates trinkets: Max Raccoon.
Max was delighted. "Now I can make lots of noise!" he rejoiced.
Did you make this craft at home? Send us a photo or tag us on social media @hazelvillage! For any questions, please email us at hello@hazelvillage.com.
You might also like:
The Animals Celebrate Wake Up Day Art Print
]]>